Sunday 13 September 2020

New Products Launch

 Good morning Crafty Friends. Today's blog post is all about the wonderful new products that have recently gone live with Close To My Heart. Two, yes that's right, TWO Idea books have released a great range of fantastic new craft products for you to play with. 

Please come on over to my online store: Julie's Online Store

Close To My Heart have always stocked great quality, affordable craft supplies for paper crafters, which is why I love them so much. This year the  mixed media range has been expanded. I'm so excited to learn new techniques with new to me products. Over the next few months I will be featuring lots of new techniques. 

Here are some highlights of the new products:

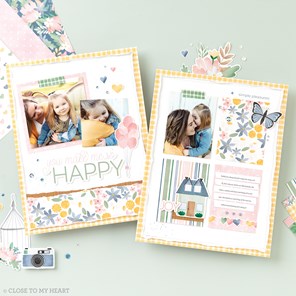
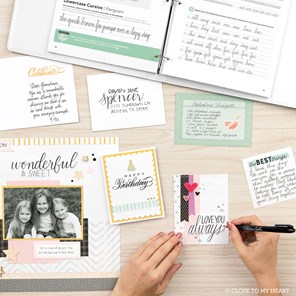
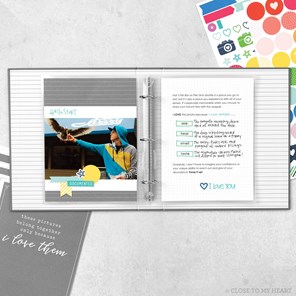
Craft With Heart: Scrapbooking and Cardmaking subscriptions. Craft With Heart subscriptions send you wonderful new layout and card kits to your door each month. They come with everything you need to complete the projects, and clear, easy to use instructions. They are a great idea to add to your crafting kit as they give you quick pages to put your photos on, or provide great cards. 

Craft with Heart™ Cut Above® Card Kit

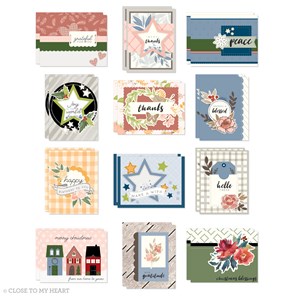
New paper suites: So many beautiful papers, some: 'Lovely', 'Party Time', 'Wood Grain', 'Foils' and solid colours will be available for a full year. 'Bloom and Grace' and 'Comfort and Joy' are a get them while you can'' issue, only available for September and October. Get in quick with those wonderful papers. 

Lovely Collection

Wood Grain Paper Packet

Stamp sets: What can I say, you know how I love my stamp sets and the current release does not disappoint. I think I will just let you go online to my store and check these out for yourselves. Just remember some are only available for September and October, so if you have a favourite, get in quick. 

I just want to mention, the stamp sets come in two different styles. There is the traditional stamp sets then there are the stamp and thin cut sets. These sets have matching thin cuts with the stamp sets and are a great idea if you are not a fan of fussy cutting. I know some of you will love these!

My Acrylix® Stamp Sets

Close To My Heart have partnered with leaders in their field to bring us lucky customers great how to programs to enhance our crafting. Again, I will let you check these out on my online store, but please check out 'Melissa Esplin' and 'Story By Stacy' programs. I think you will love them as much as I do. 

Penmanship with Melissa Esplin

Story by Stacy™ Stories I Love

Thin Cuts: Close To My Heart thin cuts can be used with any die cutting machine. They are great quality and really stand up to heavy usage, trust me on that one!!! There are so many wonderful new thin cut designs, again though some are only for the short two month September-October period. Some favourites of mine, (all really) Bows. Easily make your own bows to put on your pages and cards. This one is in my first order so I will be bringing you some artwork using these in the coming months. Stitched Hexagons: 5 different sizes of hexagons, they look fab on cards and pages alike.There are now so many different shapes, great, versatile thin cuts to use on all kinds of projects. 

I think I need to stop there I could go on for hours about Close To My Heart's thin cuts, please come on over and check them out. 

Thin Cuts & More

Embossing folders: 4 new and stunning embossing folders, a wood grain, 2 floral and a dot.  

Liquid Pearls: Oh my, what can I say. Little dots of deliciousness.... to say I'm in love with these has to be an understatement. Like Stickles you are probably already familiar with, but a solid colour. Add a touch of colour and texture to your projects with this range. 

Stickles: So many more colours, I have been using Stickles on my projects for quite some time. I love them so much sometimes I have to STOP myself from putting them on the page.... Check out the new colours.

Shimmer Brushes: I can't say enough about these versatile little tools.... I use mine ala the time, the clear one adds a great little layer of sparkle, and the colours are divine. Now Close To My Heart have released so many more colours. There are now 24 colours. So many to chose from. 

More new products, Stickles Glitter Gel, Gloss Spray, Distress Oxide Inks and Stencils. I won't say much about these at the moment as each of these I will be featuring in upcoming projects. Please have a look for yourself on my online store.

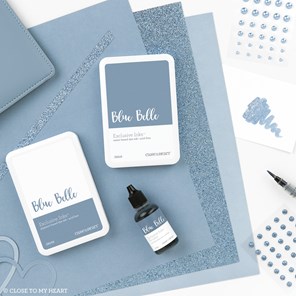
Every year Close To My Heart has a Colour of the Year, which is only available for the year. This year the Colour is Bluebell. Its a stunning colour, I know I will be using it a lot. I kind of regret only ordering one pack of the paper in my first order, I think it will be used very quickly. 

Color of the Year—Blue Belle

Now I have really just touched the surface of the many, many beautiful products released by Close To My Heart. This blog could have been so much longer, but you are all probably asleep by now. If not, well done for sticking with me until the end!

Come on over to my online store and have a browse yourself. Let me know what you think, leave a comment about what you would like to try. 

Its very easy to place an order and it can be delivered quickly to your door. Now I have to say, somehow Close To My Heart orders are getting to us quicker than my Australian orders! So please don't let it put you off they are coming internationally, you will still only have to wait about a week for your goodies. 

I think I should sign off now, till next time happy crafting friends. oh, if you would like to contact me with any questions, please see my contacts below:

How to contact me:

Facebook: Julies Paper Craft

Email: juliespapercraft2020@gmail.com

Etsy: Julie's Papercraft

Close To My Heart online store: Julie's Online Store

Blog: Julie's Papercraft Blog

Address: P.O Box 4340, Langwarrin. 3910. Vic. 


Saturday 5 September 2020

Birthday Cards

 Hi Crafty Friends, thanks for coming on over and looking at my blog. Today I want to show you a few different styles of Birthday Cards, and some tools you will need. Lets face it, we always need Birthday Cards, and a handmade card is a very special thing to give to your friends, neighbours, work colleagues, even your boss. My Boss thinks I'm so clever and creative because every year I give her a birthday card I create especially for her, made from her favorite colours. Its an easy thing for me to do and brings others so much joy. It shows people you are thinking of them. 

I use products from Close To My Heart range. You can check out my online store for yourself here:

Julie's Online Store

Close To My Heart stocks so many beautiful products to make stunning Birthday Cards, from the card bases, patterned and coloured card stock, and of course many beautiful stamps, inks, think cuts just to mention a few.

Today I wanted to show you how to make Birthday cards, using a few different products. I have used Stamp Sets, Picture My Life cards, Sticker Sheets, and Thin Cuts. 


This is a selection of stamp sets used in the cards, these are both retired sets an current sets. 

 The sticker sheet included in the new paper pack, 'Party Time' A great paper suite to make fab, colourful birthday themed cards and scrapbook pages. 


A retired Thin Cut Happy Birthday. This has had a lot of use over the years, Close To My Heart has released a new Happy Birthday thin cut and its on my list of things to buy as you can't go wrong with a thin cut.


I had fun with this project, showing you some of the different ways to use your craft stash to make a variety of Birthday Cards. I have a very large selection of Stamp Sets, they are a bit of a passion for me. But I can honestly say I use every single one, many times over. When I purchase a Stamp Set I think about the value I will get out of it. Can I use every stamp on the set, does it have multiple uses other than the obvious ones, does it fit my crafting style. If I answer yes to all these questions, then it has a place in my collection. 

Here I used retired and current stamp sets to make some quick, but I think, pretty little Birthday Cards. 


This cute little card is made with a current stamp, and thin cut sets, 'Wishing You Everything' Z3779. I know it will be one of my favorite go to sets. The Happy is coloured in with clear shimmer brush which gives it a subtle hint of sparkle, and its raised off the card with 3 D foam tape. I have also used a new paper pack, 'Party Time' which is just perfect for Birthday themes. 


I just love this card, made with a few retired stamps for the Happy Birthday, and light blue background stamp. I repeated the Happy to give a different effect and to fill the stitched square. The square and frames are from the current Stitched Square Frames thin cuts, Z4259. I matted the frame of the thin cut with 3D foam tape to give a bit of dimension. 


These two cards are made from Picture My Life cards I've had in my stash for a long time. I've jazzed them up with some simple embellishments, cardstock, stickles and stamps. If you're like me you have a stash of things you haven't used, like these cards, and they can be used to make pretty little cards. 


This card was made using a sticker from the sticker sheet included in the new 'Party Time' paper pack. I've also used the paper from that collection, and painted the Happy Birthday with clear shimmer brush to give it some sparkle. It took me next to no time and I just love the colours and effect. I can see this paper pack is going to be a favorite of mine this year. 


This card is made using the retired Happy Birthday thin cut. Its quite different from my usual style, but boy did I have fun making it. I used a very old stamp set as the background image, topped with the thin cut and added for a bit of dimension and texture the cup cake and stand, again from two different retired stamp sets, heat embossed and raised using 3D foam tape. 

I hope you have enjoyed reading this blog on Birthday Cards. I wanted to show you how to use your stash to make some quick and effective cards to send out to people. If you don't have a large stash because you are just starting out, I hope I've been able to show you how to build a craft stash that's good value for money and that you will use again and again. 

Come on over to my online store and check out a whole new range of craft products in the tow new recently released Ideas books, or check out my Etsy shop to purchase pre made cards and paper craft products. 
As always, happy Crafting Crafty Friends. 

Where to find me:
Facebook: Julies Paper Craft
Close To My Heart Online Store: Julie Morrison Shop


Saturday 29 August 2020

Texture Paste Craft

Good  morning crafty friends, today I'm showcasing texture paste.  Close To My Heart have stocked this product for a while now,  but I have been really only dabbling in it until now.   
Like most people I have a craft budget and everything I buy needs to have multiple uses.  Also, I wasn't sure texture paste would fit my style, but I was wrong!  
Let me tell you,  I'm so in LOVE with texture paste.  It is just so versatile,  the effects are awesome and it is a budget friendly item to add to your craft supplies.
Let me show you how.  

Here are the basic supplies, the texture paste and you will also need the Close To My Heart Palette Knives. I Also used quite a few baby wipes to clean the knives between uses and to clean my Versa Mat, I probably should have used our All Purpose Mat, as its much easier to clean, and I will next time.  


I used some stencils to create raised patterns, on the cards, you don't have to have stencils however.  I swiped the paste across the page to create a raised texture.  The possibilities are endless in creating texture with pattern. 

Have a play, put the texture paste on the palette knife and away you go. For the rectangle embellishments, see photo, I just masked off a piece of cardstock and then swiped over some texture paste. Once the texture paste was on the cardstock I just moved the palette knife across it in different ways to create different patterns.


I had a play mixing two mixed media products, I've added embossing powder to texture paste,  what a stunning effect that has. I let the  texture paste dry completely, and over night is best, then I just dabbled the versa mark on top of the texture paste, then I dusted the Copper Tinsel embossing powder on top. I'm so happy with  the results. You know I love  to make my own  embellishments,  I will be playing around with this technique and creating lots of unique embellishments to add to my  cards and scrapbook pages. The possibilities are endless. 

Tip: You will need to let the texture paste dry overnight so it's completely dry.  Also if using on your scrapbook page,  you will need to mat your photo.  
I find the texture paste adds a great pop to layouts,  awesome textured embellishments,  and stunning cards.  
What do you do with theses wonderful creations?  I think the secret is to just have fun, play and create.
I've been busy making lots of crafty goodness.  And Texture Paste is such a great investment to make for your crafty stash.


In the last two photos I've made a artwork to hang on my craft room wall. It was a fun little off the page project, and I think the texture paste really adds something different to the art.

If you would like to buy texture paste, or embossing powder,  or simply come on over and have a look at all the beautiful craft products,please go to my website :juliemorrison.closetomyheart.com.au

You can place an order and get it sent directly to your door. 

Email me on: juliespapercraft2020@gmail.com If you have any questions or would like help placing an order.  

I hope you have learned something interesting in this blog.  Comment below and let me know how you go. 
Also comment if there is something you would like me to post about I will do my best to play and let you know the results.
Until next time, happy crafting. 
Julie

Thursday 20 August 2020

Tri Pocket Card Holder

Hi Crafty Friends, and welcome to my very first blog in many years. I hope you enjoy it and learn something. There is nothing I love more than to create lovely things from the beautiful Close To My Heart product range. You can check the whole range in my online shop:  juliemorrison.closetomyheart.com.au 
The list of items you need for today's project are as follows:
1 12 x 12 double sided card stock. 
Bone folder
The glue I use is the Tombow Mono liquid glue, and you could also use liquid glass, which is also a go to glue for me.
Also you will need any embellishments to decorate the outside of the folder. 
All the above list, can be purchased from my online shop, see above.
Today I'm going to show you how to make a Tri Pocket folder for cards. You could use this as a simple gift, its quick and very easy to put together, and if I do say so myself, it looks quite stunning. 
You will need, a 12 x 12 piece of double sided card stock. I use pattered paper for the pocket, and of a decent weight. Copy paper or similar weight won't work, it has to be scrapbook paper weight.    
The first step is to cut you paper, 9 1/2 inches and leave the other side 12 inches. It will leave the paper 12 x 91/2 inches. 


Then, fold the paper up to the 3 1/2 inch mark. Then use your bone folder to press down on the fold. Next step is to fold across the fold you have just made.


This creates a tri pocket. The next step will be to glue all areas you have just folded. You need to glue the bottom, middle, and side areas, I hope this makes sense. I unfold the pocket out all the way again and then glue.

I then leave the pocket to dry for 24 hours, to make sure it is completely dry and strong.You could use tape runner adhesive, but I find the glue dries completely whereas the tape runner is still a little sticky and the cards can get stuck. 
After the glue is dry, you now have your pocket ready to fill with beautiful, hand made cards. Its up to you how you use this. I have put 6 cards with envelopes in this tri pocket. Three cards each side, then the 6 envelopes in the middle, high pocket. 


Tip: I make the cards as 'flat' as possible. My cards usually has lots of layers, however for this pocket it makes the cards too 'fat'. It was difficult for me to re think they way I make cards, but this is what was needed for these little gifts. 
Here are a selection of cards I have included:


Time to decorate the outside. Here is where you can let your creativity flow. Play with what you have, stamps, inks, buttons, ribbons. Here is mine finished and decorated.


Please come and check out more tips, photos and ideas on my Facebook page: 
Julie's Paper Craft
Or, if you would like to purchase any lovely hand-made cards, or other paper craft products on my Etsy shop: 

Thanks for reading, I hope you all enjoyed my very first blog, Ive enjoyed it so much there will be many more. 
Till next time Crafty Friends. 
Julie