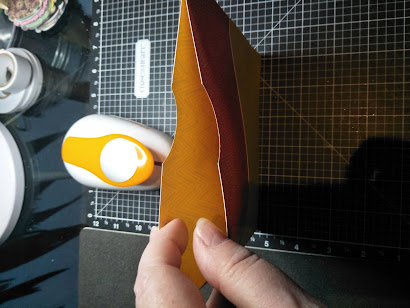
The list of items you need for today's project are as follows:
1 12 x 12 double sided card stock.
Bone folder
The glue I use is the Tombow Mono liquid glue, and you could also use liquid glass, which is also a go to glue for me.
Also you will need any embellishments to decorate the outside of the folder.
All the above list, can be purchased from my online shop, see above.
Today I'm going to show you how to make a Tri Pocket folder for cards. You could use this as a simple gift, its quick and very easy to put together, and if I do say so myself, it looks quite stunning.
You will need, a 12 x 12 piece of double sided card stock. I use pattered paper for the pocket, and of a decent weight. Copy paper or similar weight won't work, it has to be scrapbook paper weight.
The first step is to cut you paper, 9 1/2 inches and leave the other side 12 inches. It will leave the paper 12 x 91/2 inches.
Then, fold the paper up to the 3 1/2 inch mark. Then use your bone folder to press down on the fold. Next step is to fold across the fold you have just made.
This creates a tri pocket. The next step will be to glue all areas you have just folded. You need to glue the bottom, middle, and side areas, I hope this makes sense. I unfold the pocket out all the way again and then glue.
I then leave the pocket to dry for 24 hours, to make sure it is completely dry and strong.You could use tape runner adhesive, but I find the glue dries completely whereas the tape runner is still a little sticky and the cards can get stuck.
After the glue is dry, you now have your pocket ready to fill with beautiful, hand made cards. Its up to you how you use this. I have put 6 cards with envelopes in this tri pocket. Three cards each side, then the 6 envelopes in the middle, high pocket.
After the glue is dry, you now have your pocket ready to fill with beautiful, hand made cards. Its up to you how you use this. I have put 6 cards with envelopes in this tri pocket. Three cards each side, then the 6 envelopes in the middle, high pocket.
Tip: I make the cards as 'flat' as possible. My cards usually has lots of layers, however for this pocket it makes the cards too 'fat'. It was difficult for me to re think they way I make cards, but this is what was needed for these little gifts.
Here are a selection of cards I have included:

Time to decorate the outside. Here is where you can let your creativity flow. Play with what you have, stamps, inks, buttons, ribbons. Here is mine finished and decorated.
Please come and check out more tips, photos and ideas on my Facebook page:
Julie's Paper Craft
Or, if you would like to purchase any lovely hand-made cards, or other paper craft products on my Etsy shop:
Or, if you would like to purchase any lovely hand-made cards, or other paper craft products on my Etsy shop:
Thanks for reading, I hope you all enjoyed my very first blog, Ive enjoyed it so much there will be many more.
Till next time Crafty Friends.
Julie


No comments:
Post a Comment